Tuning Touch Sensors with Microchip SAM E51 IGaT Curiosity

Image Source: Kalawin/Stock.adobe.com
By Adam Taylor for Mouser Electronics
Published July 17, 2023
Introduction
The ability to add small, touch-capable displays to microcontrollers gives developers a powerful solution for applications ranging from home automation systems to automotive and consumer products. A key aspect of working with a touchscreen is tuning the touch sensors, which adjusts the gain and detection threshold applied by the touch controller.
Tuning and validating the touch sensors ensures the correct functionality of the touchscreen. If the screen is e.g. overly sensitive, then a finger close to—but not touching—the screen may result in a touch being detected. Similarly, a screen that isn’t sensitive enough may require the user to apply pressure for a touch to register.
In this project, we will perform touch tuning on the Microchip Technology SAM E51 Integrated Graphics and Touch (IGaT) Curiosity Kit. The kit is based on the SAM E51 microcontroller, which incorporates an Arm® Cortex®-M4 processor capable of running at up to 120MHz and provides 1MB of flash and 256KB of SRAM. The SAM E51 also provides a Peripheral Touch Controller (PTC) that supports up to 256 sensor channels.
Begin by connecting the SAM E51 IGaT board to the programming PC. Using a Micro USB-to-USB A cable, plug the Micro USB side of the cable into the board’s Micro USB port labeled Debug and plug the USB A into an available port on the PC (Figure 1).
Begin by installing MPLAB X and the correct compiler (Figure 1).
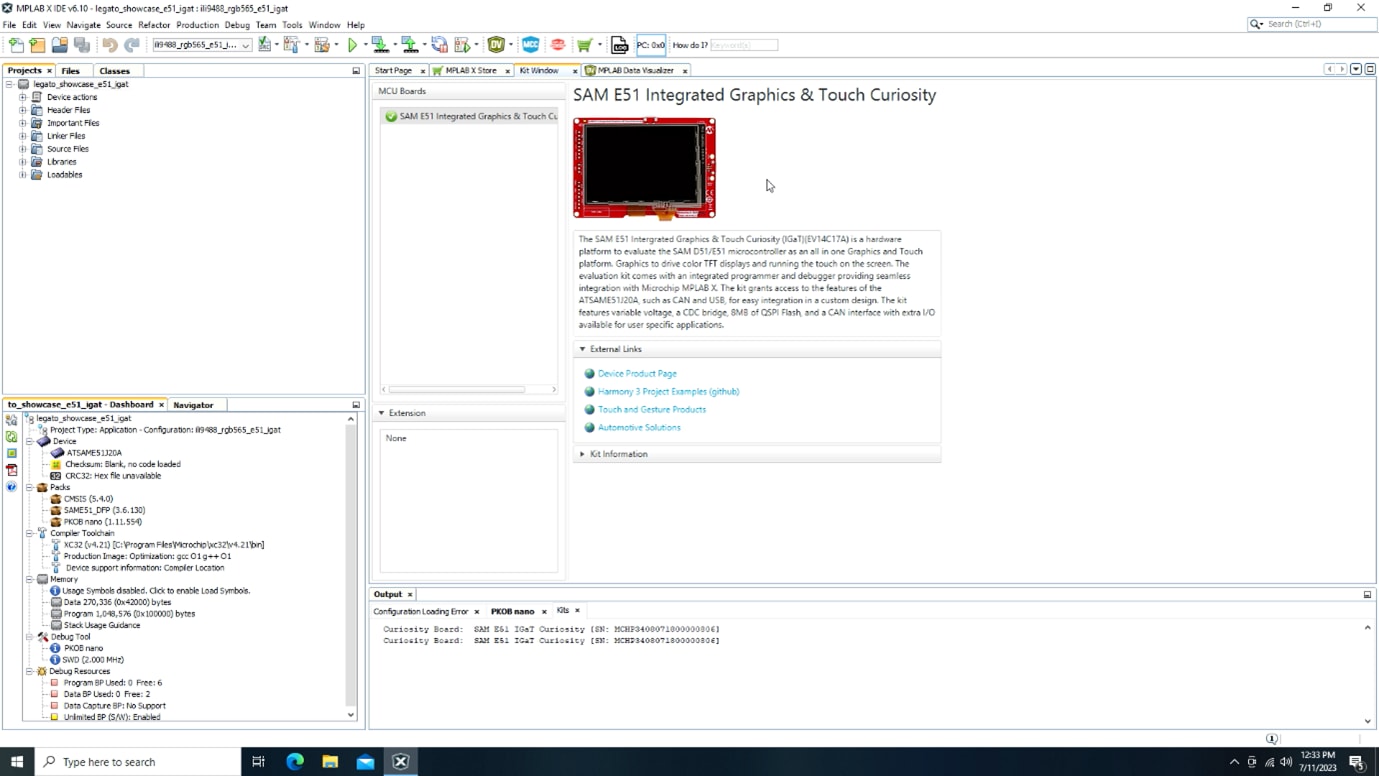
Figure 1: MPLAB X Kit Window with SAM E51 Integrated Graphics and Touch Curiosity connected (Source: Mouser Electronics)
To perform touch tuning on the SAM E51 IGaT Curiosity board, we will use the Microchip MPLAB® integrated development environment (IDE), which includes the following tools:
- MPLAB X enables the compilation and deployment of the application.
- MPLAB Data Visualizer provides debugging capabilities.
- MPLAB Harmony software development framework simplifies the development of the embedded solution.
- Microchip Harmony Graphics Composer
Begin by installing MPLAB X and the correct compiler (Figure 2).
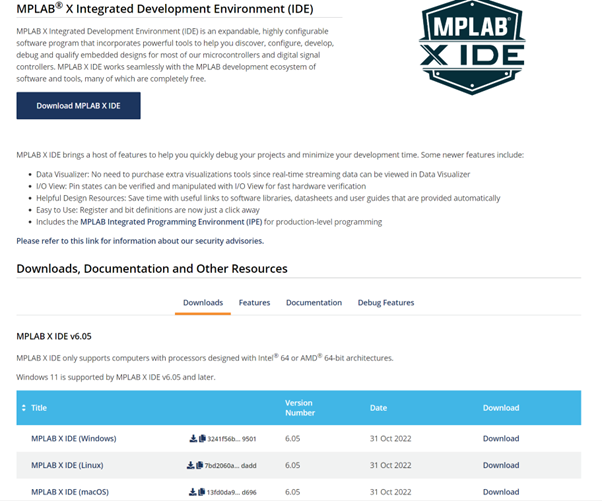
Figure 2: Download screen for the MPLAB X IDE. (Source: Mouser Electronics)
To use MPLAB X, you must also download an MPLAB XC Compiler (Figure 3), For this application, download the XC32 Compiler because the SAM E51 microcontroller is based on the 32-bit Cortex-M4 processor.
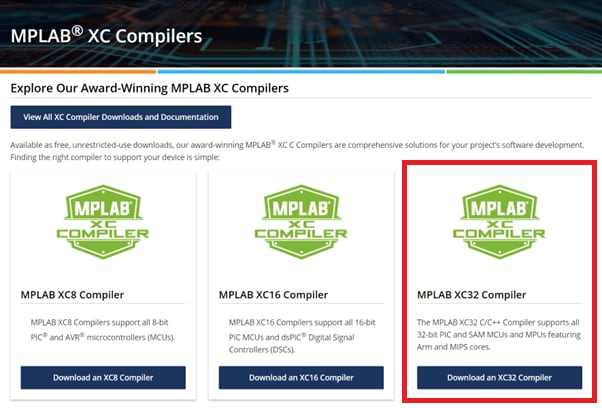
Figure 3: MPLAB XC Compilers download page. (Source: Mouser Electronics)
After downloading and installing both MPLAB X and the XC32 Compiler, install the demo applications that will form the basis for this project.
Navigate to the Microchip MPLAB Harmony Github (Figure 4) and either download and extract the gfx_apps_sam_d5x_e5x compressed file or clone the gfx_apps_sam_d5x_e5x v3.10.0 repository to obtain the GFX Applications SAM D5x E5x demos.
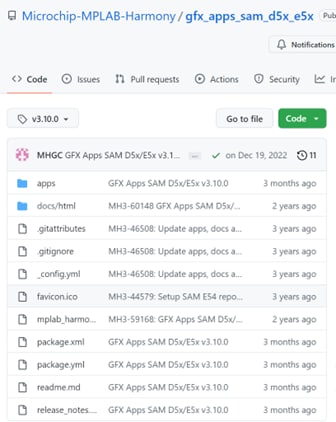
Figure 4: GFX Applications SAM D5x E5x demos on the Microchip Github repository. (Source: Mouser Electronics)
Now that you have the applications, you can start testing and updating the application to enable calibration of the touch sensor interface.
Open MPLAB X IDE, click the Tools menu, select Plugins, and make sure you have the necessary plug-ins. Under Available Plugins, download the MPLAB Code Configurator plug-in, MPLAB Touch plug-in, and the MPLAB Data Visualizer plug-in if not already installed (Figure 5). Once each plugin is selected, click Install.
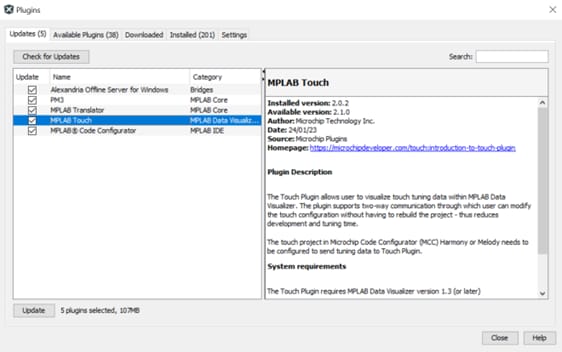
Figure 5: Installing the MPLAB Touch plug-in. (Source: Mouser Electronics)
After you have installed the plug-ins, open the legato_showcase_e51_igat project downloaded and extracted from the Microchip MPLABX Harmony GitHub repository (Figure 6).
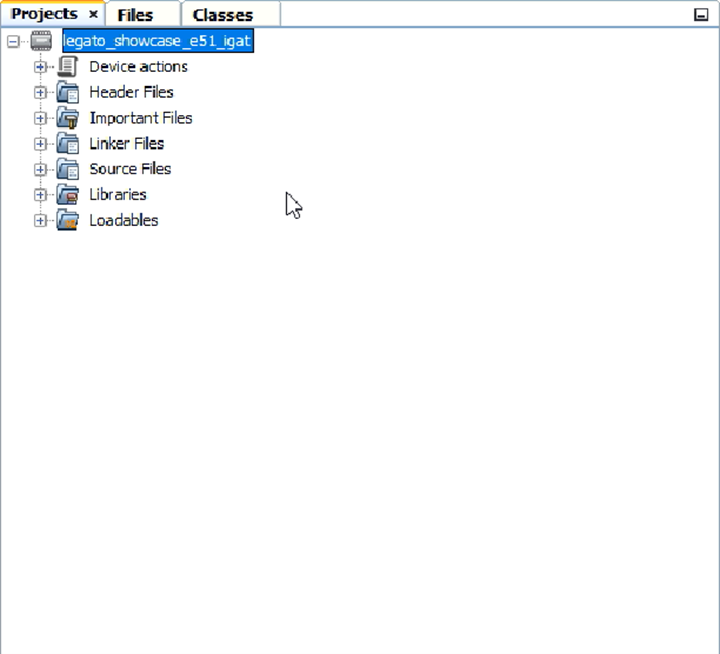
Figure 6: Opening the legato_showcase_e51_igat project. (Source: Mouser Electronics)
Next, click the MPLAB Code Configurator icon on the menu bar to open MPLAB Code Configurator, If the MPLAB Code Configurator Content Manager Wizard appears (indicating required content), click Finish to continue. If you receive a warning indicating missing packages, note the missing packages and click Continue.
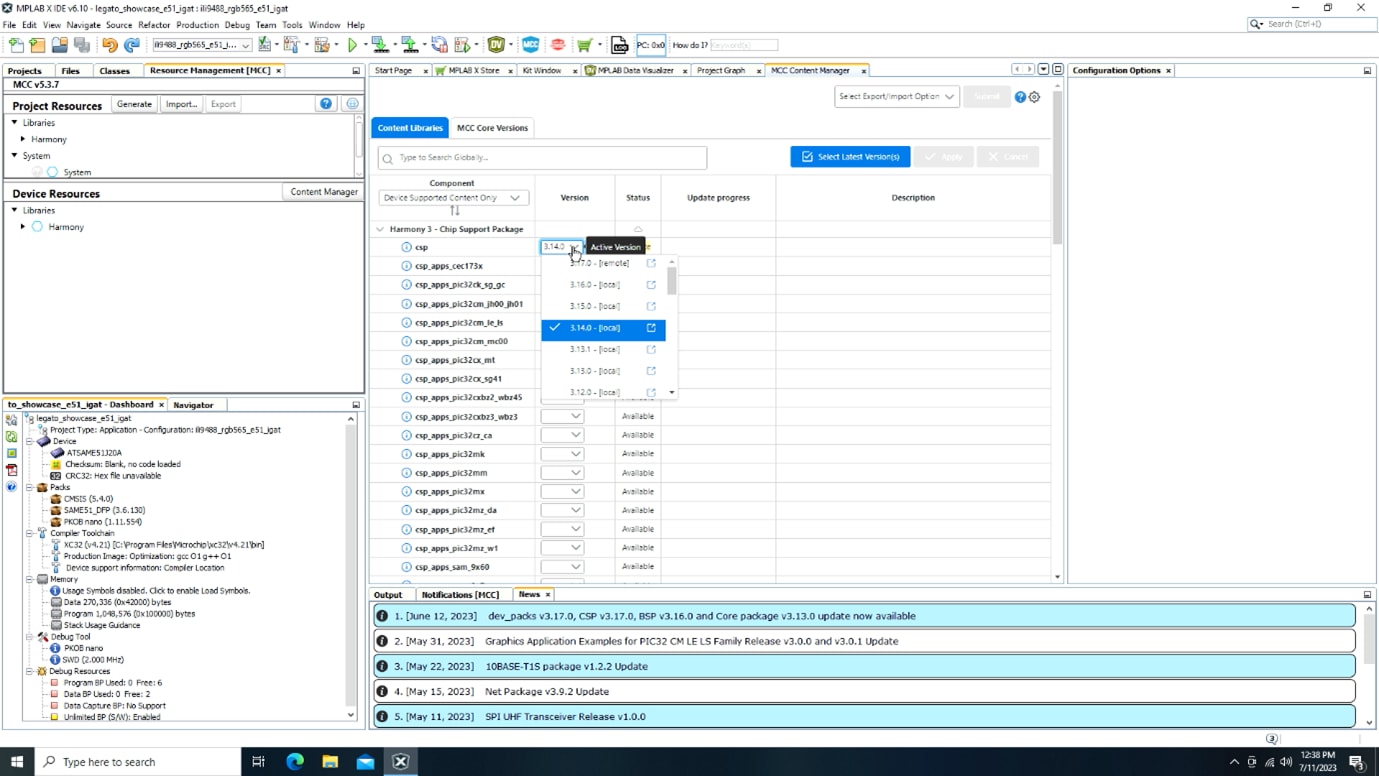
Figure 7: MCC Content Manager (Source: Mouser Electronics)
Once the project is initialized, open the list of packages by selecting Content Manager from the Device Resources box on the left side of the screen (Figure 7). Use the global search to locate each package, and once selected, click Apply. In some cases, you may need to use a previous version of each package installation.
In the MPLAB Code Configurator, you will see the configuration of the system, including the use of the integrated Touch Driver (Figure 8).
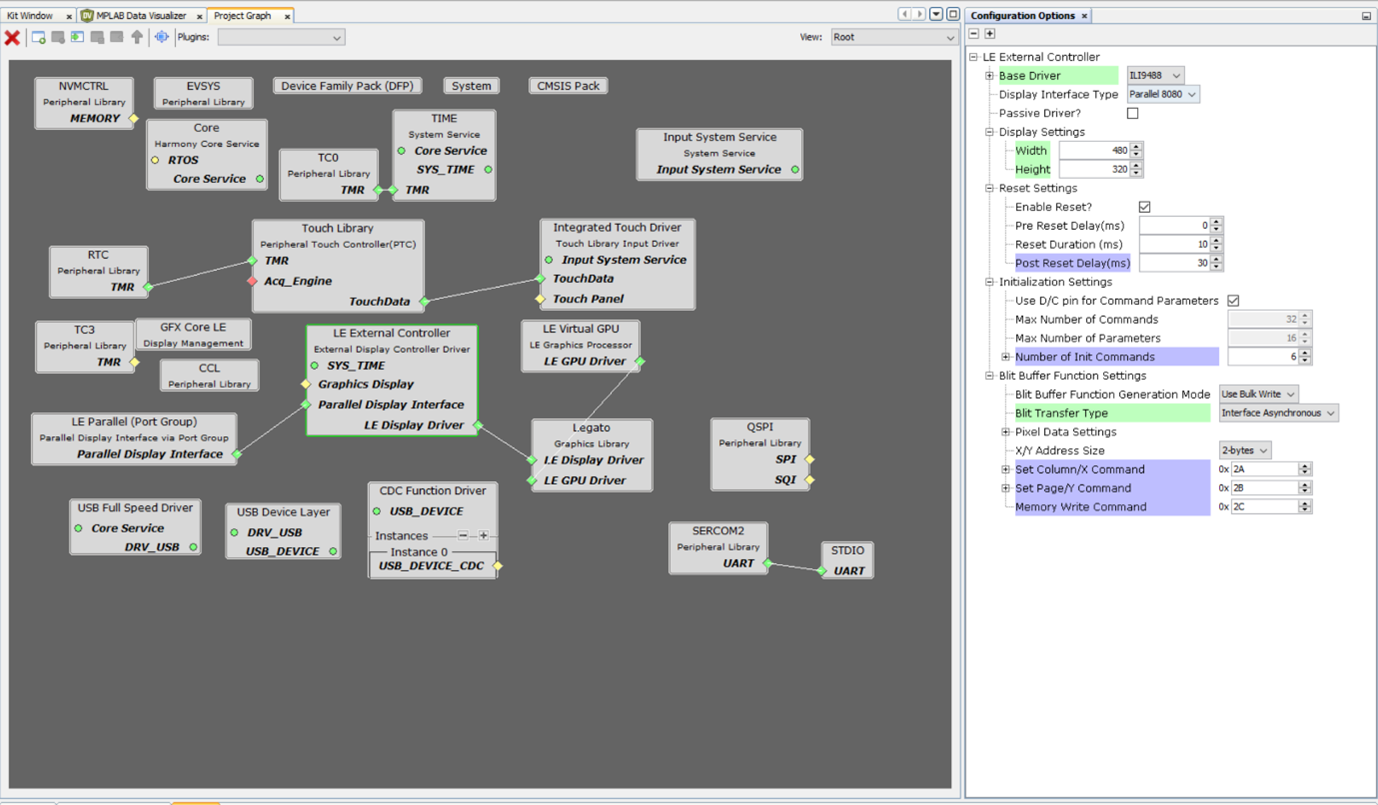
Figure 8: Project configuration as it appears in MPLAB Code Configurator. (Source: Mouser Electronics)
In the Project Resources box under Resource Management, click Generate to generate the C language code; there are no changes, . Once the code has been generated, click the Make and Program icon (or locate it under the Production menu) to load the application to the SAM E51 IGaT Curiosity board connected to your development machine.
The demo application will run on the SAM E51 IGaT Curiosity board (Figure 9).
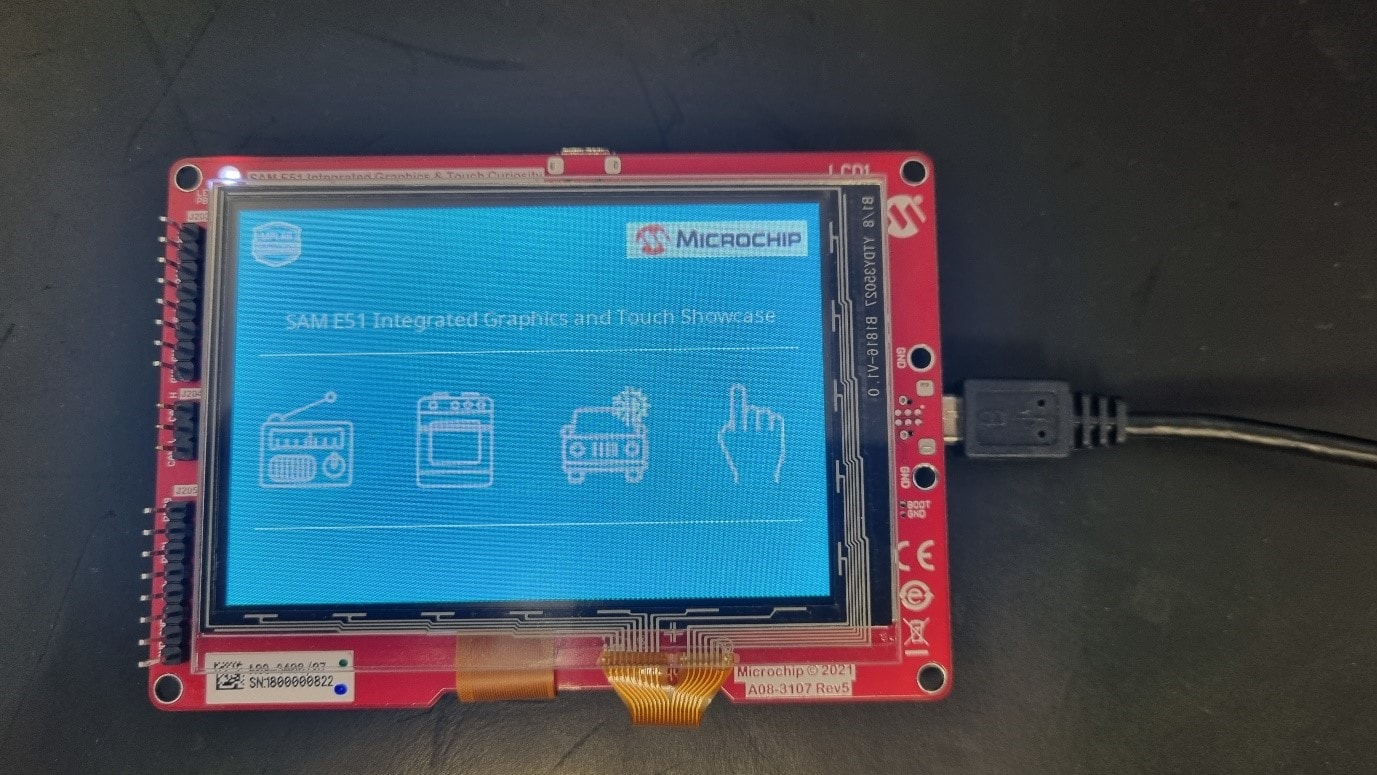
Figure 9: Demo application running on the SAM E51 IGaT Curiosity Kit. (Source: Mouser Electronics)
Next, modify the settings for the Touch Library in the MPLAB Code Configurator so it can transmit data over the serial port. This will allow you to tune the touch sensors of the attached touchscreen.
In the MPLAB Code Configurator, open the Touch Library menu by selecting the Touch Library from within the Project Graph in the MPLAB Code Configurator (see Figure 10), and then open the Touch Configuration sub-menu. In the Touch Debug Configuration sub-menu, (Figure 8). This will create a new port on the Touch Library block, indicating it needs to be connected to a UART.
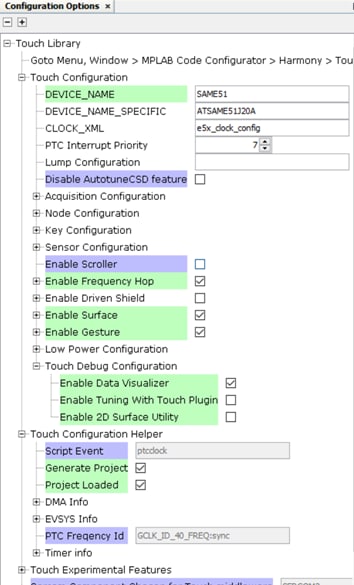
Figure 10: Configuring the Touch Library. (Source: Mouser Electronics)
In MPLAB Code Configurator, connect the UART from the Touch Library to the UART of the SERCOM2 to enable serial communication output by the touch sensor for tuning (Figure 11).
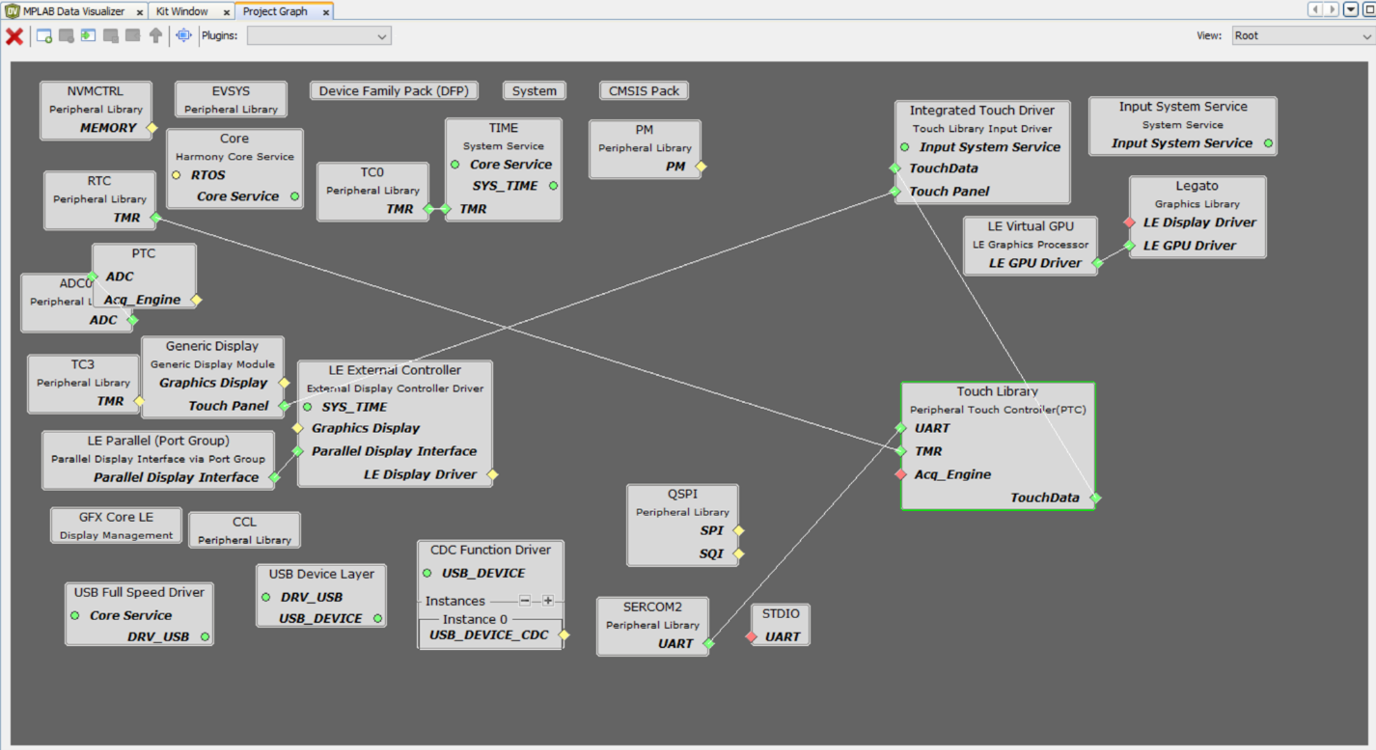
Figure 11: Updating MPLAB Code Configurator. (Source: Mouser Electronics)
To explore the settings of the touch display, view the touch configurations in Harmony by selecting “Window” à MPLAB Code Configurator à Harmony à Touch Configuration. The show the gain, analog gain, and thresholds (Figure 12).
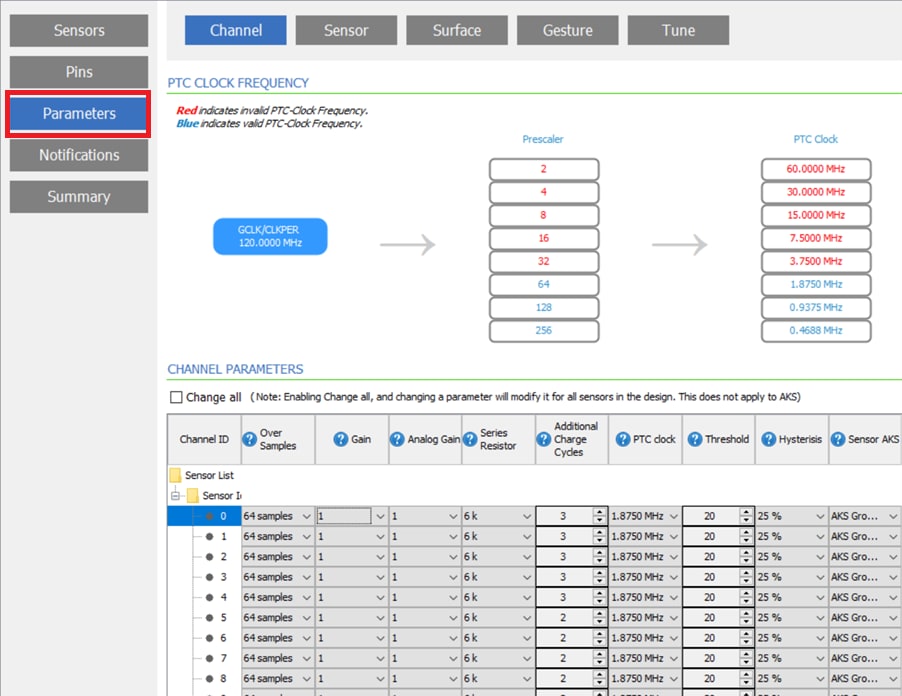
Figure 12: Touch settings parameters. (Source: Mouser Electronics)
Now that you have modified the software architecture, click Generate to generate the software, and then perform any merge suggested in the generated code. Once the software has been generated successfully, re-build the application, and program it to the SAM E51 IGaT Curiosity board.
With the software running on the Curiosity board, you can connect to the target with the Data Visualizer software by selecting the appropriate COM port for your device, setting the baud rate to 115200, and clicking the play button to see the data transmitted over the serial port (Figure 13).
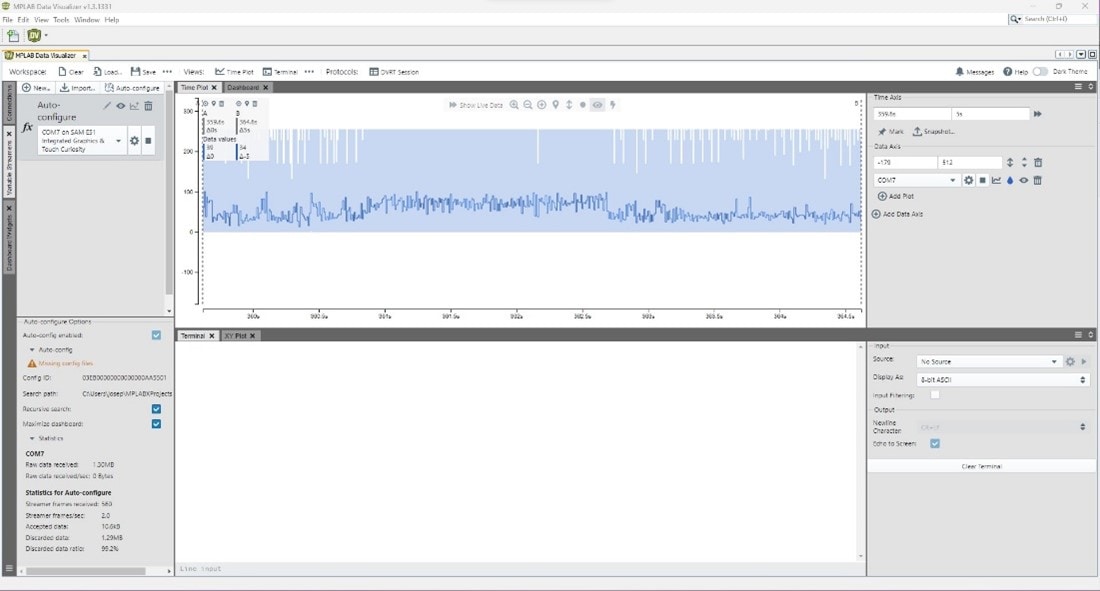
Figure 13: Touch data displayed in the Data Visualizer. (Source: Mouser Electronics)
Next, expand the Touch menu in Data Visualizer and select the COM port for the Curiosity board as the source. Then click the play button to start parsing the touch variables from the data stream and visualizing them in the Touch Plugin.
You can use the values transmitted through this interface to tune the gain and threshold of the Harmony Touch Configuration menu.
Conclusion
This project showed how to use MPLAB X, Harmony, and Data Visualizer to perform touch tuning with the Microchip SAM E51 IGaT Curiosity Kit, ensuring the correct sensitivity of the touchscreen.