Pest Detection Using Machine Learning on Edge Devices
Getting Started with Nicla Vision and Adrastea-I FeatherWing
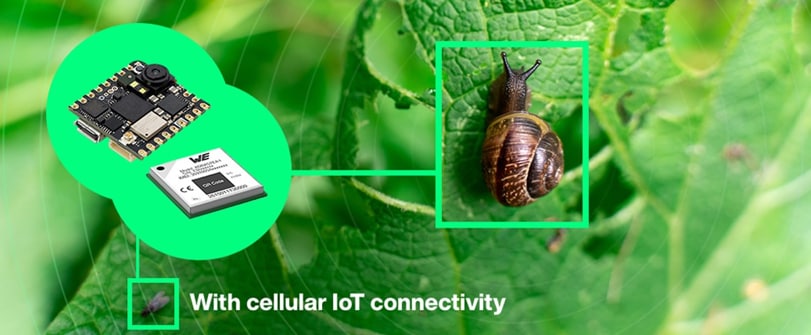
Image Source: Mouser Electronics
By Rafik Mitry, Mouser Electronics, and Shashank Hegde, Würth Elektronik eiSos
Published September 10, 2025
In the realm of smart agriculture, pest detection has traditionally relied on labor-intensive methods, leaving crops vulnerable to damage and farmers facing unpredictable yields. However, the emergence of cellular Internet of Things (IoT) technology and edge computing has enabled a significant shift. As it does for predictive maintenance in industrial settings, cellular IoT enables real-time monitoring of crop conditions using sensor devices. Additionally, with the help of machine vision on edge devices, it is now possible to analyze data locally, enabling battery-powered devices with real-time monitoring capabilities. This allows for timely intervention to prevent pest infestations, maximizing agricultural productivity and minimizing losses. This article explores how cellular IoT and edge computing are transforming pest detection, from data collection to predictive analytics, ushering in a new era of precision farming.
Project Material and Resources
Project Bill of Materials (BOM)
- Würth Elektronik Setebos-I Wireless FeatherWing
- Würth Elektronik Adrastea-I FeatherWing
- Adafruit Feather M0 Express
- Arduino Nicla Vision
- Adafruit male-male jumper wires
- Adafruit USB Type-C cable
- PC
Project Code/Software
- Arduino IDE
- Arduino command line interface
- OpenMV
- Edge Impulse
- Edge Impulse command line interface
- Visual Studio Code
- PlatformIO IDE extension for Visual Studio Code
- Würth Elektronik FeatherWings GitHub repository
Project Technology Overview
The following sections provide information on the development boards and technologies we will use in this project.
Development Boards
The Würth Elektronik Setebos-I Wireless FeatherWing (Figure 1) offers seamless wireless connectivity with advanced Bluetooth® Low Energy 5.1 functionality based on the Würth Proteus-III radio module. Featuring a proprietary 2.4GHz radio based on the Würth Thyone-I module, it ensures robust communication with integrated security elements and +6dBm transmit power. When paired with another Setebos-I device and configured in transparent mode, it facilitates seamless and secure cable replacement.
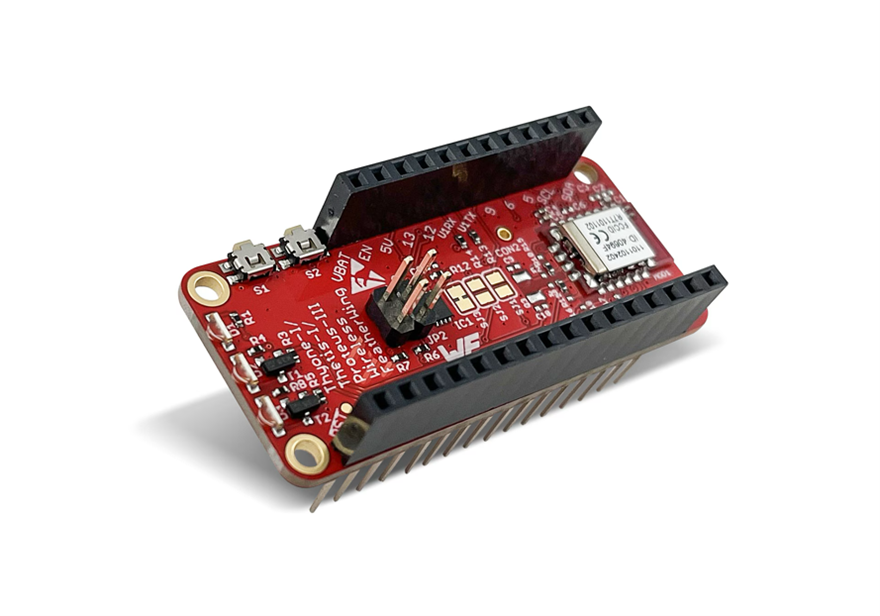
Figure 1: Würth Elektronik Setebos-I Wireless FeatherWing. (Source: Würth Elektronik)
With an SPP (Serial Port Profile)-like serial profile in Bluetooth Low Energy mode and mesh networking capability in proprietary mode, it supports transparent mode for versatile applications. Designed in the Adafruit Feather form factor, it is easy to expand with Würth Elektronik FeatherWings and hundreds of existing Feather-compatible boards.
The Würth Elektronik Adrastea-I FeatherWing board (Figure 2) features LTE-M/NB-IoT capability, external LTE and GNSS antennas, and a USB cable. It offers flexible mode selection between LTE-M and NB-IoT, integrated GNSS supporting GPS and GLONASS, an Arm® Cortex®-M4 MCU, and compatibility with various protocols and bands.
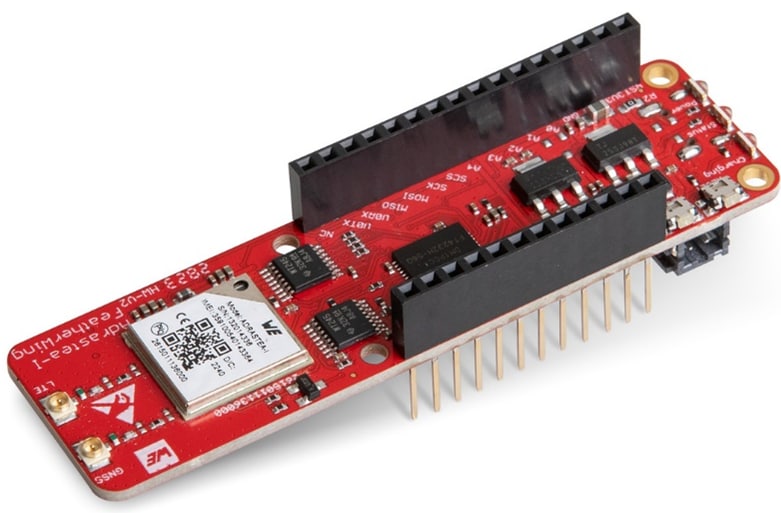
Figure 2: Würth Elektronik Adrastea-I FeatherWing. (Source: Mouser Electronics)
The Adafruit Feather M0 Express (Figure 3) is a Feather MCU board based around the Microchip Technology ATSAMD21G18 48MHz Arm Cortex-M0 processor. The chip provides 256KB of flash memory and 32KB of RAM and has built-in USB-to-serial programming and debug capability.
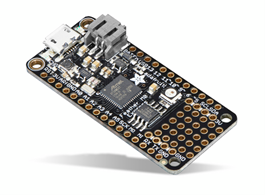
Figure 3: Adafruit Feather M0 Express. (Source: Mouser Electronics)
The Arduino Nicla Vision (Figure 4) is equipped with a robust STM32H747AII6 dual Arm Cortex-M7/M4 IC processor and a 2MP color camera, enabling support for TinyML. Additionally, it features a smart six-axis motion sensor, an integrated microphone, and a distance sensor. The board also integrates fully with OpenMV, supports MicroPython, and provides Wi-Fi® and Bluetooth Low Energy connectivity.
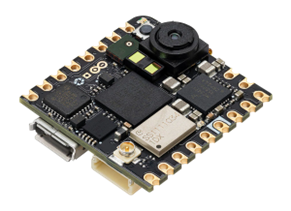
Figure 4: Arduino Nicla Vision. (Source: Mouser Electronics)
Edge Impulse
Edge Impulse is a development environment for machine learning (ML) on embedded devices. It enables the collection of real-world sensor data, the development of an ML algorithm, and easy model deployment on any edge device (Figure 5).
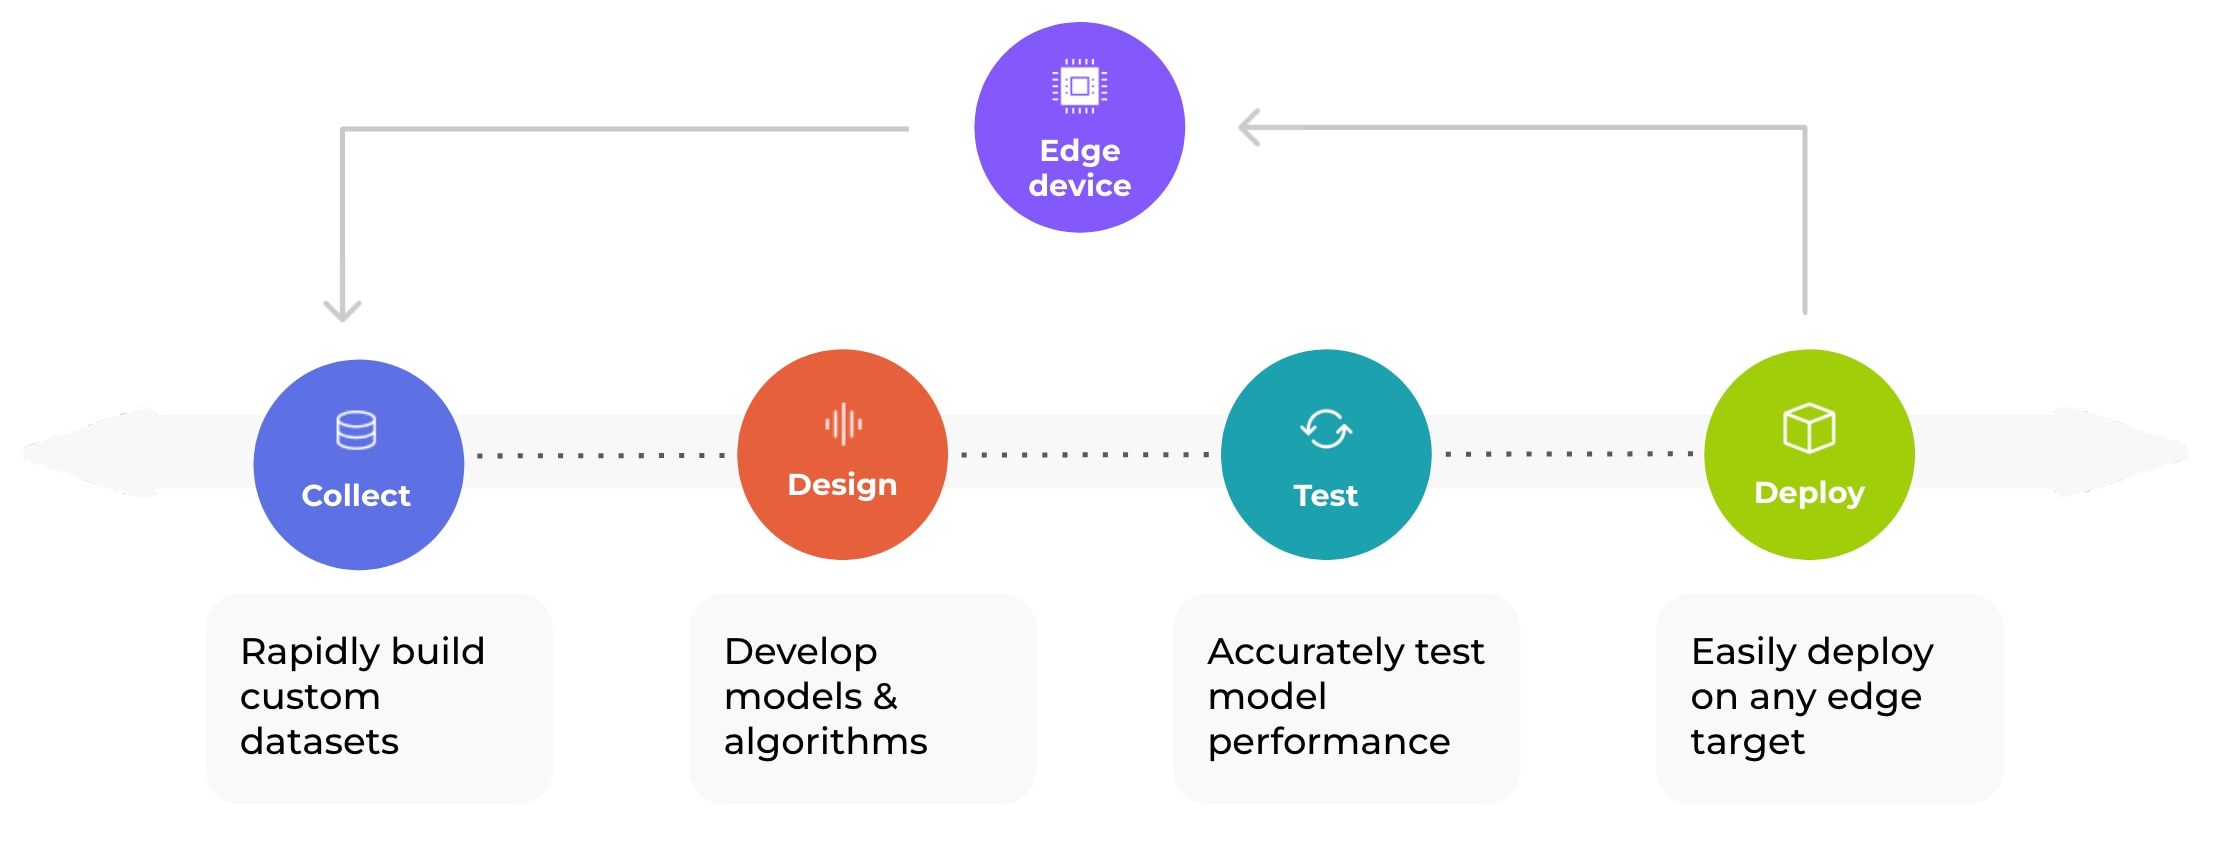
Figure 5: Edge Impulse machine learning flowchart. (Source: Edge Impulse)
Hardware Setup
Before assembling the hardware, we will outline our project’s architecture (Figure 6). The Nicla Vision serves as the vision component of our system, tasked with running the ML model. It will be connected to the Setebos-I board, facilitating the transmission of data to our main node (i.e., gateway). This main node comprises a Setebos-I board, Adafruit Feather M0 Express, and an Adrastea board, which is responsible for transmitting the collected data to the cloud via cellular IoT connectivity.
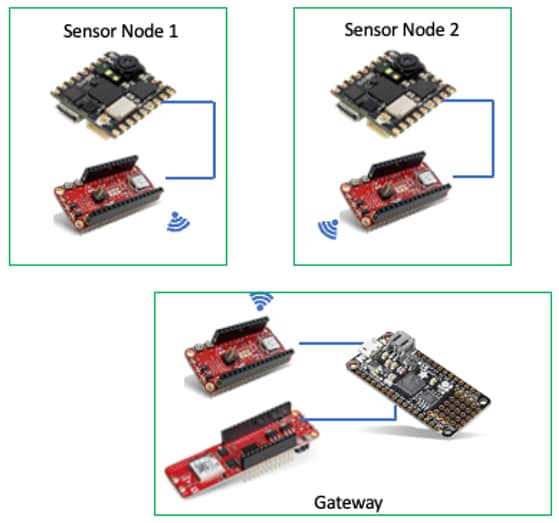
Figure 6: Project architecture showing the gateway and two sensor nodes. (Source: Mouser Electronics)
Connect the pins of the sensor nodes as shown in Table 1.
Table 1: Sensor nodes pin assignments
|
Nicla Vision |
FeatherWing Setebos-I |
|---|---|
|
GND |
GND |
|
3V3 |
3V3 |
|
TX |
RX |
|
RX |
TX |
- Put the Setebos-I FeatherWing into Transparent mode.
- Connect pin 3 on jumper JP1 to 3V3.
- To create the gateway, stack the Setebos-I FeatherWing in Transparent mode on the Adrastea FeatherWing, and then stack the Adrastea FeatherWing on the Adafruit Feather M0 Express.
Software Setup
Before configuring the Arduino Nicla Vision within Edge Impulse, you must install the Edge Impulse command line interface and the Arduino command line interface. Next, download Visual Studio Code and the PlatformIO IDE extension according to the instructions in the Software Installation section of the Würth Elektronik FeatherWings GitHub repository.
Finally, upload the example code to the Adafruit Feather M0 Express:
- Clone/download the FeatherWings repository.
- Open the AdrasteaThyoneBridge
- Build and upload the code to the Adafruit Feather M0 Express.
Machine Vision Model Training
Edge Impulse makes building a machine vision model very easy, requiring just a few images to create the Impulse that trains the model.
- Create an account on the Edge Impulse website.
- Create a new project.
- Click Data acquisition, and then click Connect a new device.
- Scan the QR code on the Edge Impulse screen. Then use your mobile phone to photograph the pest from different angles and in different lighting. The images will automatically be synced with your Edge Impulse account.
- After collecting the images, click Labeling queue (Figure 7) to label the pest.

Figure 7: Labeling queue button on the Edge Impulse platform. (Source: Mouser Electronics)
- Drag your mouse around the image of the pest to create a bounding box. In the text box that appears, type a description of the pest (Figure 8).
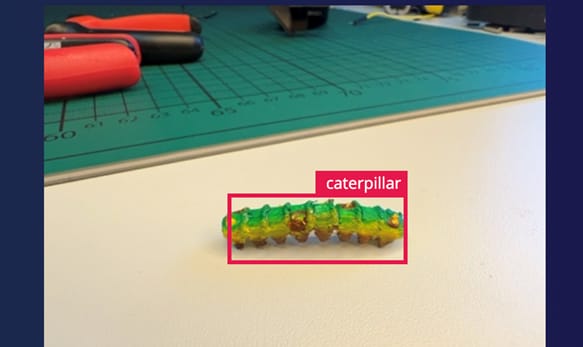
Figure 8: Edge Impulse pest labeling. (Source: Mouser Electronics)
Now that you have collected the pest data, you will train the model through an impulse.
Creating the Impulse
The impulse uses signal processing to extract features from the raw data and then uses a learning block (Figure 9) to classify new data.
- Adjust the image data to match your image.
- For the processing block, choose Image.
- For the learning block, choose Object Detection.
- Click Save Impulse.
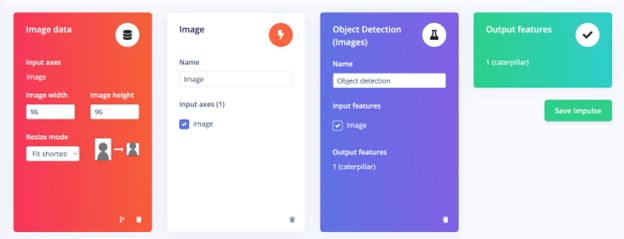
Figure 9: Creating the impulse. (Source: Mouser Electronics)
Neural Network Classifier
The neural network classifier takes some input data and outputs a probability score indicating the likelihood that the input data belongs to a particular class. For this project, set the training cycles to 60. The training output and its accuracy are shown on the right side of the window.
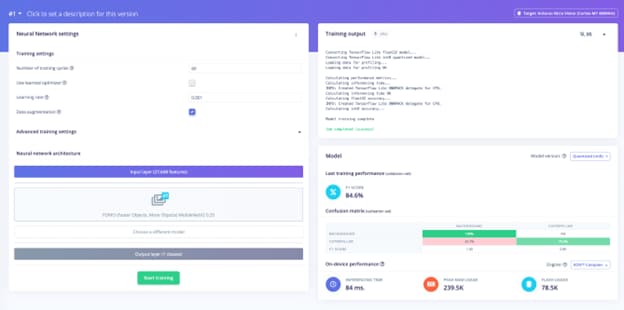
Figure 10: Neural network training and output. (Source: Mouser Electronics)
Export the impulse as an OpenMV firmware and navigate to the OpenMV IDE. Download the files from the Mouser GitHub page and plug the Nicla Vision into your computer. Then, use our trained model.
Note: Double-press the RESET button on the Arduino Nicla Vision to start the flashing process.
- Load the firmware:
- Click Tools, and then click Run Bootloader (Load Firmware).
- Choose the downloaded firmware .bin file and select the Erase internal file system
- Click Run and wait for the board’s blue LED to blink.
- Click OK on the confirmation screen.
- Open the script:
- Click File, and then click Open File.
- Open the py script from the .zip file you downloaded as part of Mouser’s trained model.
- Run the script (Figure 11) by clicking the Play button at the bottom-left corner of the IDE.
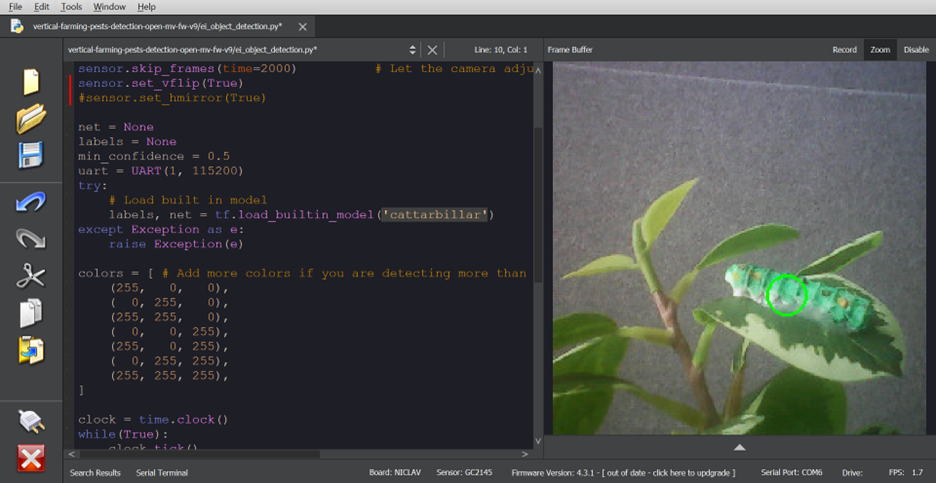
Figure 11: Machine vision model running on OpenMV. (Source: Mouser Electronics)
Wireless Connectivity
Sensor to gateway: The Setebos-I Wireless FeatherWing operating in Transparent mode acts as a cable-replacement 2.4GHz wireless link. In this mode of operation, all the data that comes in from the Nicla Vision via the UART (Universal Asynchronous Receiver-Transmitter) interface is transmitted wirelessly. Similarly, the information received on the wireless link is forwarded to the UART.
Gateway to cloud: The gateway includes a peer Setebos-I FeatherWing that receives messages from nodes. The data from the radio is transmitted transparently to the Feather M0 Express via UART. On boot up, the M0 MCU configures the Adrastea-I FeatherWing to connect to the cloud MQTT broker. Once the M0 MCU receives messages from the sensor nodes, it publishes the data directly to the cloud. The cloud MQTT broker publishes the messages to all the subscribed clients. You can receive the messages using any open MQTT mobile phone application.
Conclusion
Advancements in electronics and ML enable complex tasks such as object detection with limited hardware resources. This complexity, combined with wireless connectivity, creates a robust mechanism to remotely monitor and control the environment. In this example, we used these technologies to build a prototype pest detection system that can be applied to smart and connected agriculture.
Author Bios
 Rafik Mitry joined Mouser Electronics in 2019 after finishing his Master’s degree in Electrical Engineering at the Technical University of Munich, where he also worked in research in the field of energy harvesting for three years. As a Technical Marketing Engineer at Mouser, Rafik creates unique technical content that reflects current and future technology trends in the electronics industry. Besides keeping up with the latest in technology trends, Rafik is an avid lover of aviation and tennis.
 Shashank Hegde is a Master’s student at Technical University of Munich. He has worked at Würth Elektronik eiSos GmbH & Co. KG since 2022 as an Intern/Working Student in the wireless connectivity and sensors division. His research interests include embedded systems, Internet of Things, and vehicular communications.